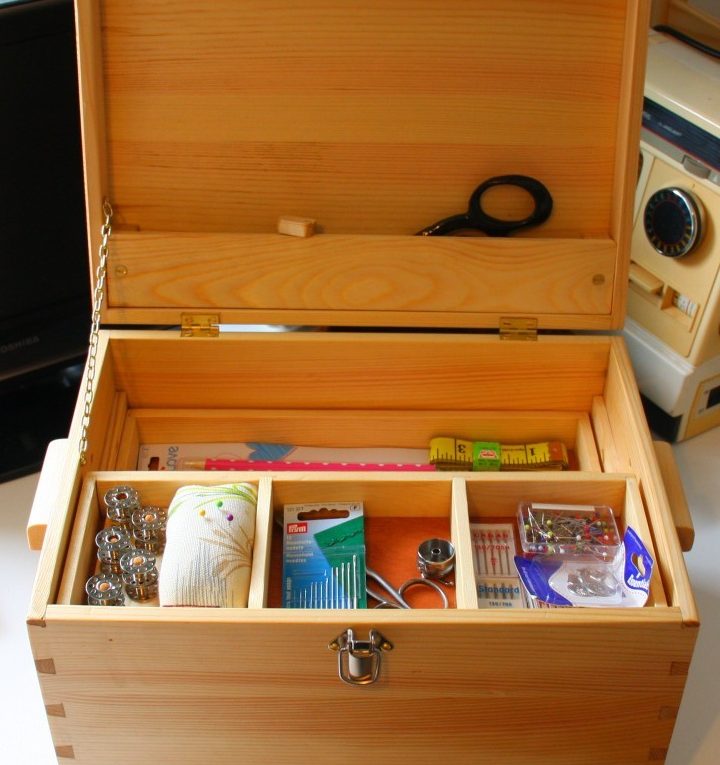
Handmade pine sewing chest

Handmade pine sewing chest 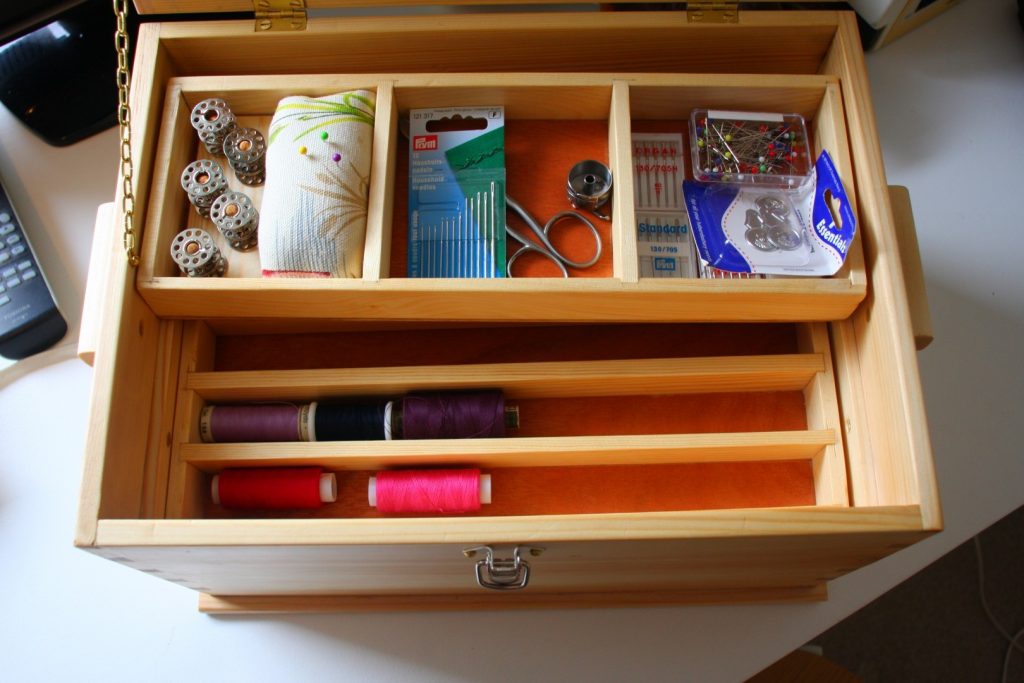
Handmade pine sewing chest showing detail of lift-out trays for thread and accessories
Following the handmade oak picture frame I made for our wedding anniversary, I decided I had to make something for my wife’s birthday. I was looking for a project that would be useful as well as looking nice and testing my hand woodworking skills. I had made dovetails previously but only in small tool storage projects (I’ll try and share more about those at some point) so making a larger box with multiple dovetails was a good challenge.

The box needed to be reasonably deep, but I didn’t want it to be too heavy. Nowhere locally sells pine boards thinner than 1″ PSE so I decided to rip my own boards with my Aldi bandsaw and joint them to get the width I need. The bandsaw has a maximum capacity of around 80mm so I ripped the boards from some 3×4″ pine PSE bought from our local timber supplier. I had to choose sections carefully to avoid the knots. I was after a finished thickness of around 10mm so I ripped 15mm boards and planed off the worst of the roughness with my number 5 plane, before jointing with the same plane and gluing up in to panels, then once the glue was dry planing to flatness with first the number 5 and then the number 4 plane. This itself was good practice and I didn’t quite achieve the perfect boards but certainly good enough for this job. I’ve come to believe that while you should certainly strive to do the best you can, it’s better to make something useful and get better the next time rather than keep trying repeatedly and make nothing of any value until you achieve perfection. (That’s definitely not the same as being slapdash and lazy and not trying to get the best result you can). Also by having my various attempts around the house as useful objects I can use them as a reminder in future of how my skills have developed (and spot any mistakes I made so I don’t make them again).
Once the boards were prepared, I started the joinery. I was going to do the box first but then I realised it would be better to do the lid part first, since there was only going to be one dovetail at each corner of the lid, and I was using a single piece of wood rather than a glued up panel, so any mistakes would be easier to rectify. I was glad I did. While I paid great attention to getting the dovetails neat and cut to the lines, I made one fatal mistake with one of the side pieces, cutting the pins at one end of the piece the wrong way round to the other end, so that rather than fitting together as three sides of a rectangle they fit together in a Z shape! Oops. Very glad at this point that I didn’t make that mistake with one of the larger panels. It was easy enough to remake the side piece and keep the other one somewhere obvious as a reminder to be more careful in future!
The lid went together fairly well, though at first I hadn’t really accounted for quite how many clamps I would need when gluing the flat top onto the box!
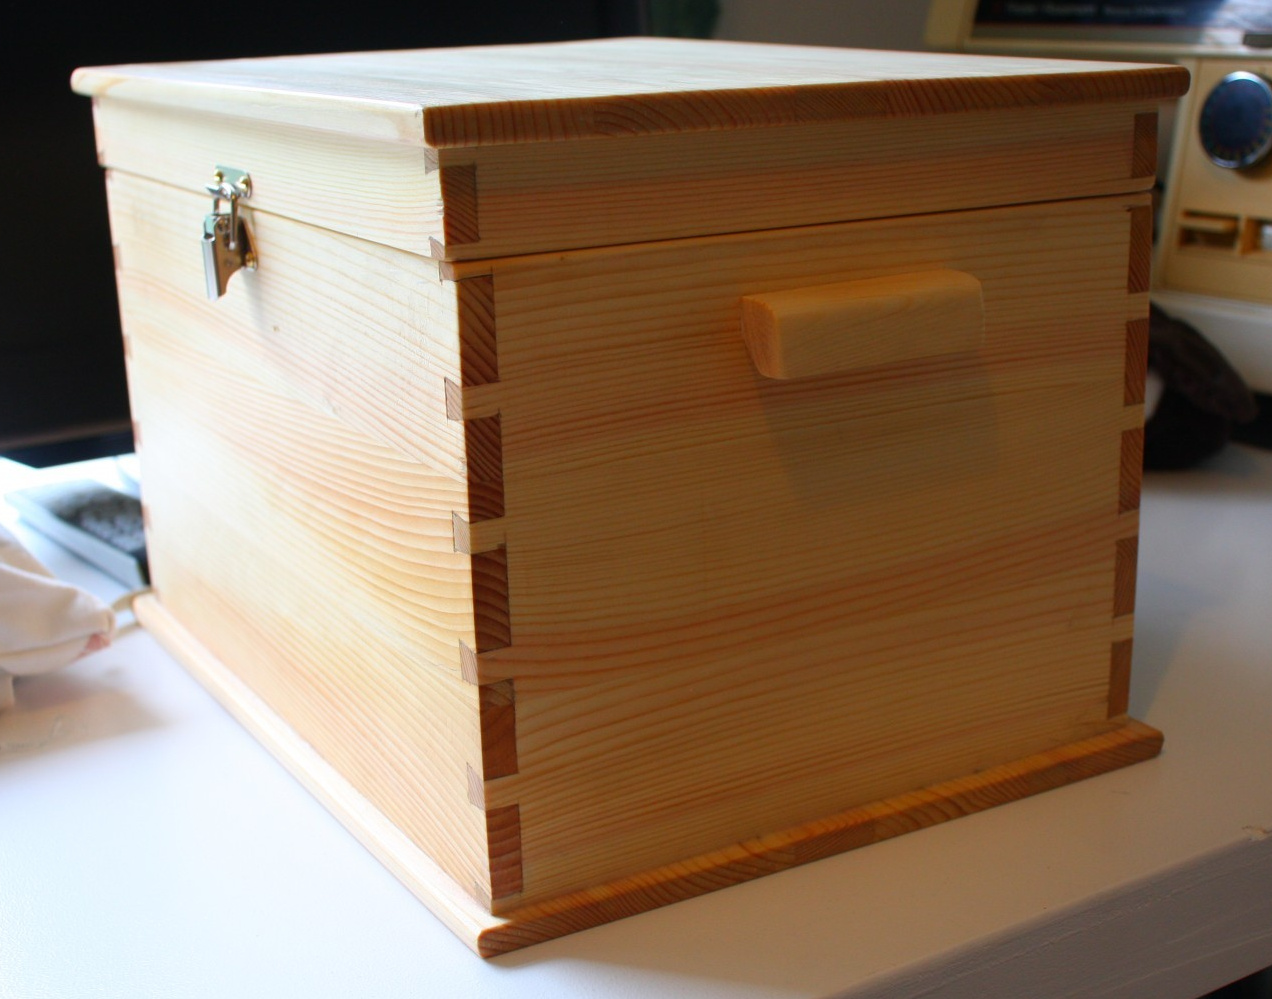
Now it was on to the big one, the 5 dovetails at each corner of the box. I did these slowly and carefully over the course of a couple of evenings and while again they aren’t all perfect they are not bad for my first ever go of a project of this size.

With the box and lid assembled I moved on to make the box inserts and handles, which I will cover in the next post.